Friday, August 25, 2023

Easy mini slimline birthday cards

 Hi,

Today I`m back with a quick post to share these easy and fun cards I made for some school friends of my son. They celebrate their birthday together so I made all cards simular just playing around with colors and the pattern papers on each card. It was so quick and easy to do and I had great fun creating them. I decided to go with the size of a small slimline card and the stripes from my 6*6 inch paper pad covered the card base easily even when they where glued on diagonal. I don`t have many typical younger boys pattern paper, but I found this old Authentique Suave collection that I`m really happy with.


I stamped and diecut my sentiments backing them on differets shapes of matching cardstock. I kept my cards very basic since they probably will be thrown away right away - I mean thats fine, they are 7 year old boys. But since my son is gifting money I just wanted to put it in something a little extra and so on the inside I made a small pocket to insert the money he will give.


This stamp set is an older stamp set in Norwegian from Kort og Godt were you get different sayings on the circles so I chose to use a different sentiment for each card. 


I`m playing along :

The Male Room: Challenge 177 - Dots and/or Stripes (themaleroomchallengeblog.blogspot.com)


Wohoo! So excited to be among the honourable mentions at the male room this week.


Hope this quick and easy jet very striking way of creating inspired you to create yourself a happy day crafting too :)

Thank you for stopping by,

-Christine💮


Wednesday, August 23, 2023

Mini album - Summer Breeze

 Hi, 

Today I`m happy to share the mini album I made to go with the explosion box I shared in my last blogpost. I made it as a gift to my friend using photos from our trip to Gran Canaria earlier this year. I love how the beautiful Summer Breeze collection from Ciao Bella goes perfectly to our warm and sunny beach holiday. 

This post ended up to be a bit photo heavy, lets take a look.


This folio mini album was put together following Maymay made it Wonder-folio. This type of folio was just the type I was planning to make as it fits mostly full sized photos and as such is very photo friendly. There are so many stunning mini albums out there with lots of smaller fancy fun folds and they display the pattern paper so beautiful, but personally I think this style of minialbum or folio album fits better if you want to use them with your photos. So this is the style I wantet this time.

I kept the cover of my folio clean just fuzzy cutting HOME so it can be stored easily, but I think this paper is so pretty even by itself. For my closure I used magnets to keep it shut.


So this is what it looks like when you open up. My friend was so kind to let me share with some photos inside. I really wanted to show the beautiful paper combined with some photos to show how great this design displays them.


Left some space for some journaling. I put magnets hidden under the scallup circles and added die cut photo on the insides to keep the flap closed. Isn`t this paper pad just gorgeous.


I fuzzy cut the embellishment from the paper pack as the only decoration inside this folio.


Inside the pockets there are small booklets that fit three full sized photos and I had to make more of those to fit in all the pictures I wanted to include from our trip. So this folio is full and I probably would make it with a tad bigger spine if I where to make it again. But it`s not too bulky and closes flat.


I love how this project turned out and had such a good time making this to my friend as a memory from the trip she invited me to come along on.


I hope you liked it and that you got inspired to use one of the many many tutorials out there and make it into a project yourself. I shure loved making this folio following Maymay made it and I don`t feel the need to make everything from scratch using different mini album pages put together myself every time. All this crative talent out there is there to enjoy, get inspired from and learn from.

Happy crafting, hope this post inspired you to create yourself a happy day crafting too.


Thanks for stopping by,

-Christine💮


Sunday, August 20, 2023

Explosion box - Summer Breeze

Hello everyone,

Today I`m finally able to show my explosion box using the pretty Summer Breeze papers from Ciao Bella. I made this as part of a gift for my friends birthday using pictures from our trip to Gran Canaria earlier this year. I will post the folio mini album made for the same trip in my next blogpost as it is quite photo heavy. 

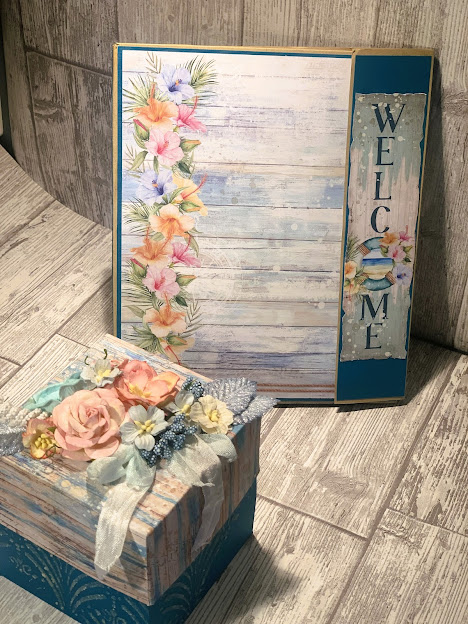
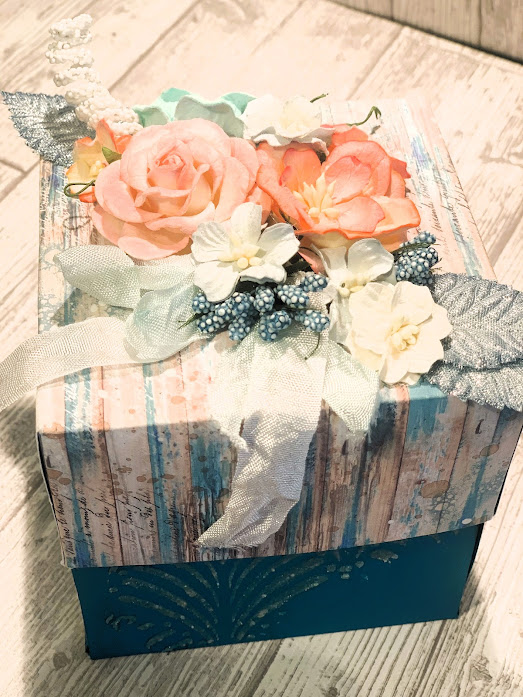
I just love how this explosion box with photos taken from our trip turned out, and the papers match the theme perfectly. The lid is made from a 12*12 paper from the collection and the base is made from colored cardstock. I used Finnabair texture paste white sand and Art deco wall stencil to decorate the base of the box . I love how the sand paste adds that extra detail like glittery beachy sand to go with the summer holiday feel from this trip.


And here is the inside. I`m so happy how this turned out. For one flap I put in a tag where I wrote a personal message and for the rest I placed photos on pop up dots for added demension. 


In the center I glued down cut outs from the paper pack and decorated with flowers. The butterflies are glued on acetate strips as if they are flying. 


You can find Jacky Drake`s tutorial on a beautiful fluttering card using acetate  here on YT 
or as an explotion box by Vicky here.


I had so much fun making this, and the hardest part was to embrace myself an cut into all the beautiful design papers. Looking forward to share my folio album that I made to mach the explosion box.


CKN Design- create happy days crafting (@ckndesign_craft) • Instagram-bilder og -videoer


I`m entering this fun explosion box to 

Simon Says: Use Your Favorite Technique | (simonsaysstampblog.com) I can`t choose only one favourite technique, but in this one I used stencils that I love to add in many of my projects.

I hope you liked it and that you got inspired to create yourself a happe say crafting too. Why not try to make an explosion box yourself.

Thank you for stopping by,

-Christine 💮

Saturday, August 19, 2023

My Besties - Birthday card

 Hi,

Today I`m able to share the birthday card I made for a special friend. I chose this lovely image from Sherri Baldy`s my besties because it makes me think of my friend and her sweet little dog. 

I wanted to color a beach scene for this card since my friend loves the beach and warm weather. I recently came across Amyyoungforever on IG and I got the inspiration for this background from her. I kept the design for my card simple keeping the colored image as the star of the show.

The sentiment is in norwegian from Papirdesign says "Yesterday is history, Tomorrow is a mystery, and today is a gift". 


Here are the Copic colors that I've used:
Skin: E000- 00-04-11-21, R20-22
Hair: E41-43-44-47
Outfit: B91-93-95-97-99, W0-1-3, R81-83-85-89
Dog: E30-33, R81-83-85
Sand:E30-33-41-32-43-44
Sea:B0000-000-32-34-60
Sky:B0000-000-23-32-60, Y000-00, YR000-31, RV000-00-10-34 - 0 (blender)


I`m entering this card to:

Simon Says: Use Your Favorite Technique | (simonsaysstampblog.com) and I can`t choose just one, but I love,love,love Copic coloring, so this is the technique i chose to use.


Hope you like it and that you got inspired to create yourself a happy day crafting too,
thank you for stopping by.

-Christine🌸