Wednesday, November 15, 2023

Christmas ornament card

Hi friends,

Today I have a Christmas card to show you. It’s about time to start producing them if I want to get ready in time to ship out this years Christmas cards. 

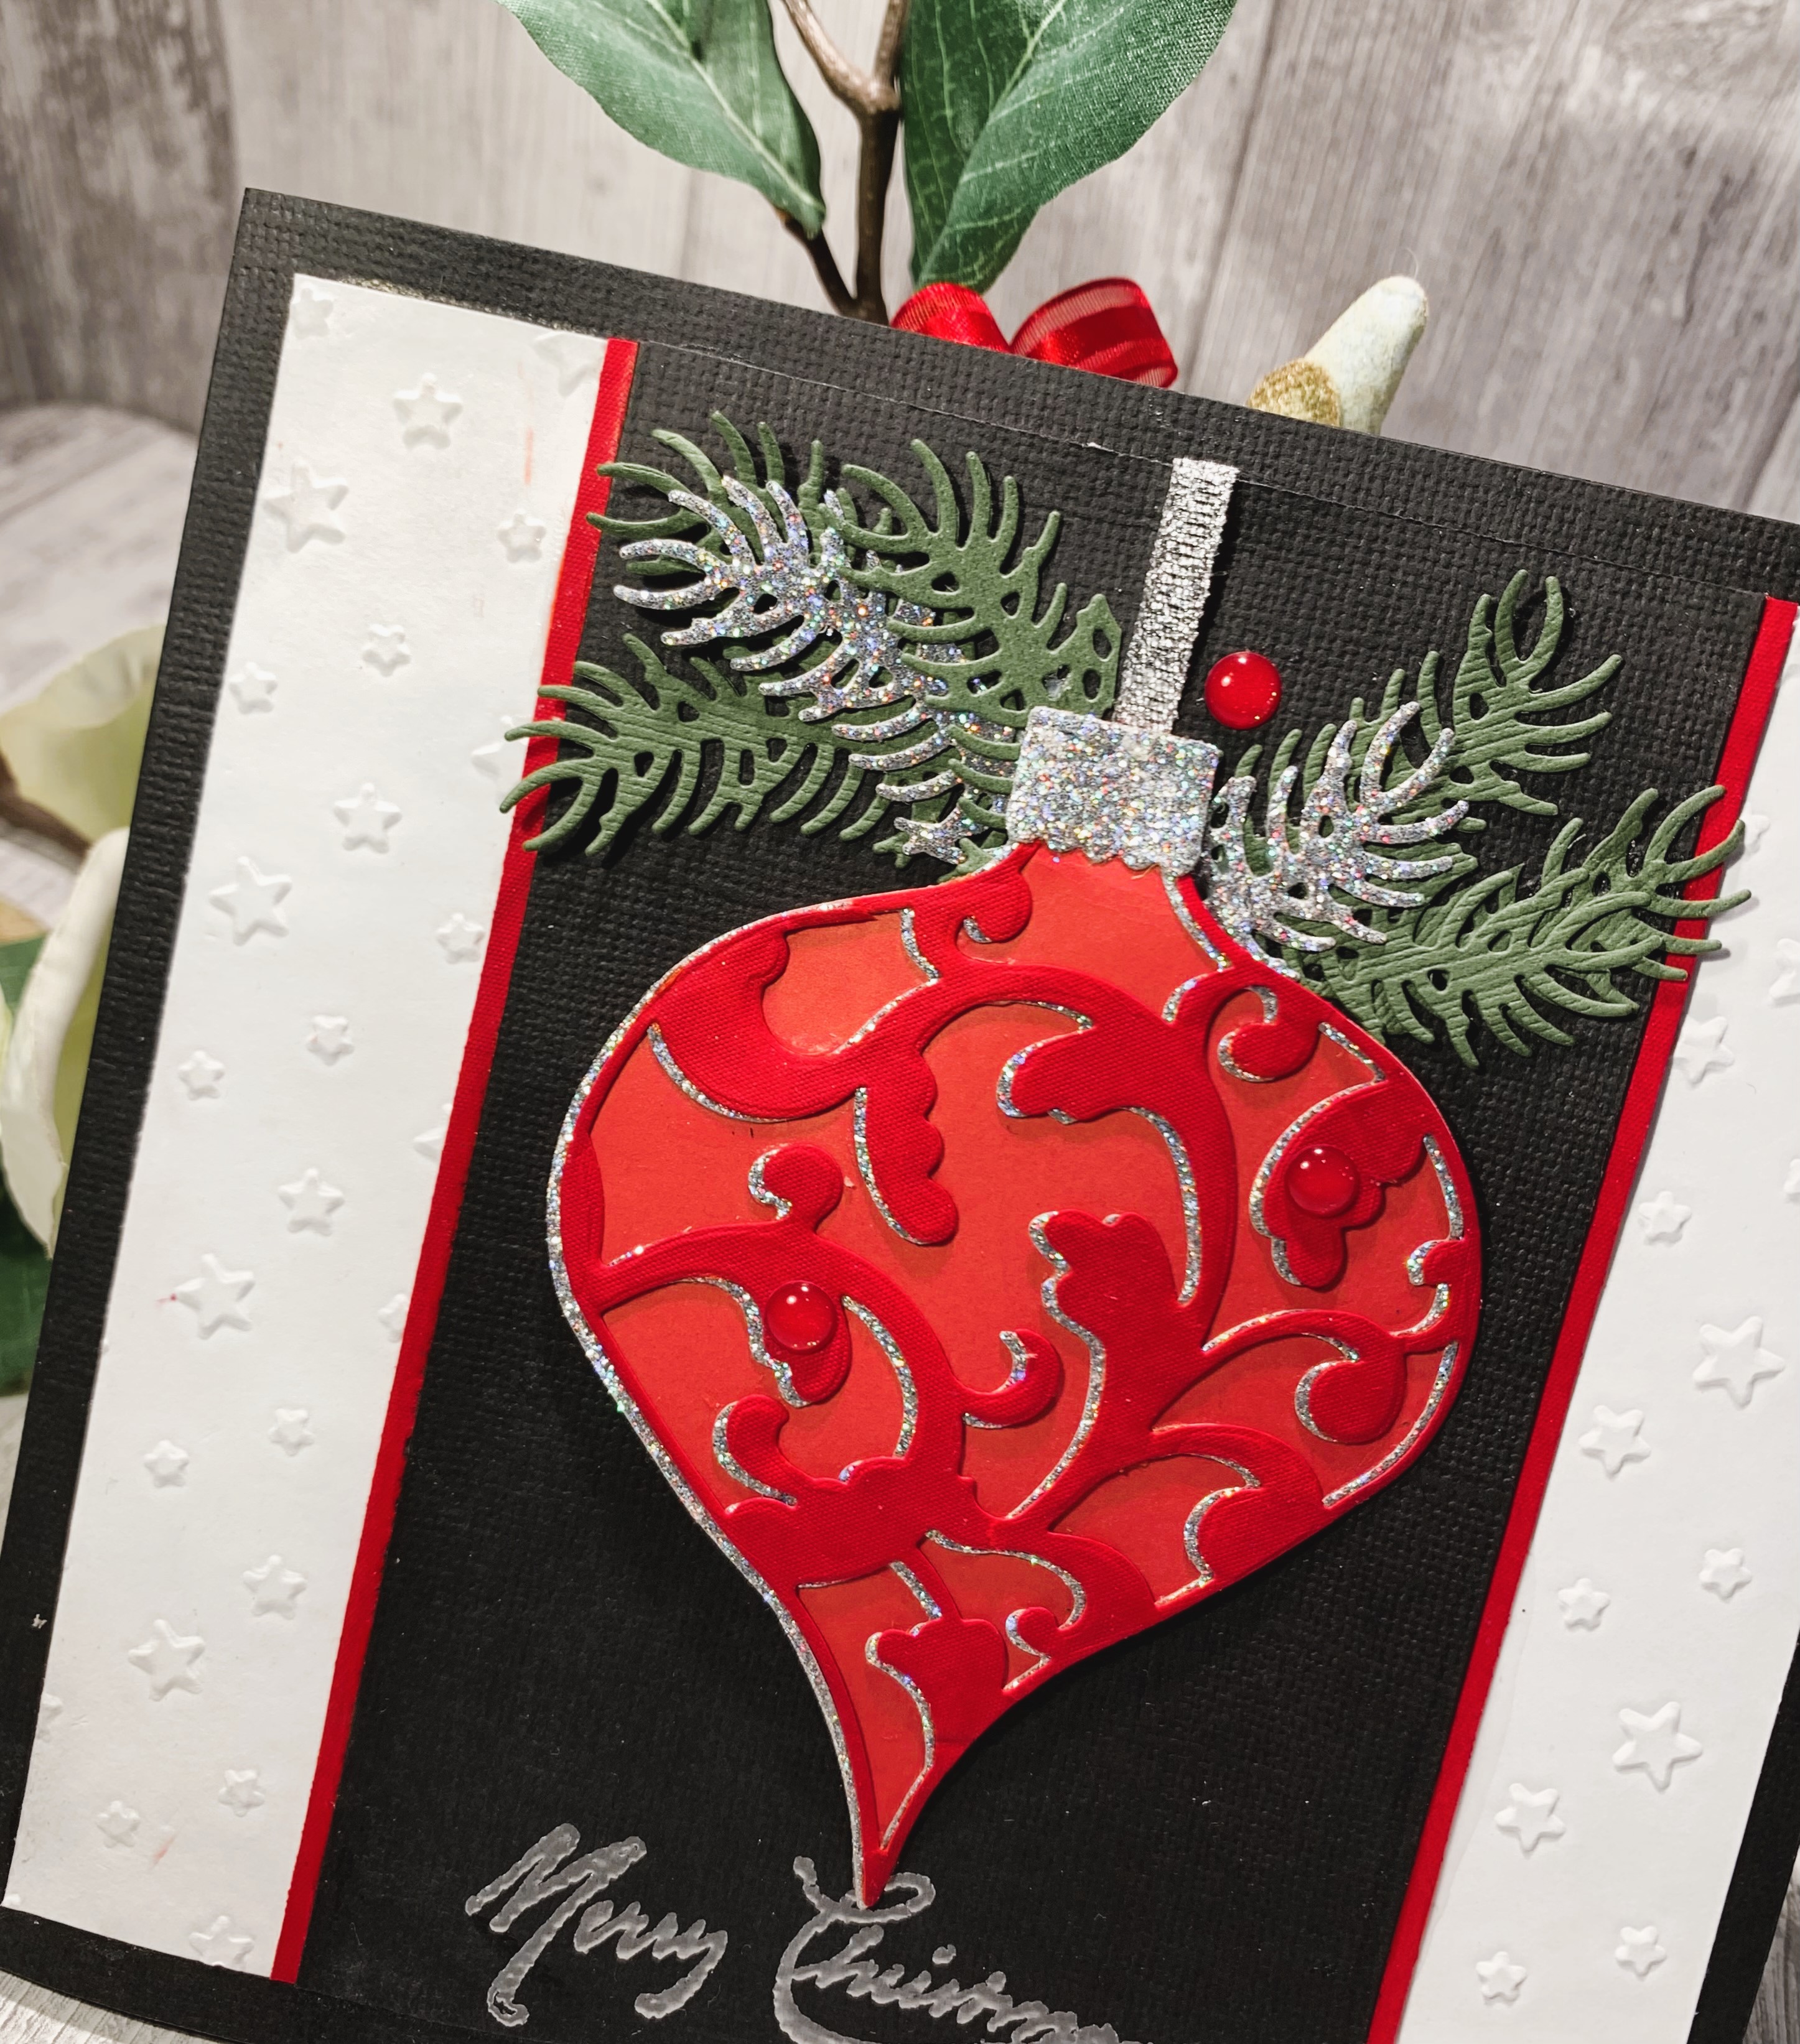
I have used Elliana Ornament from Memory box cut it out in sparkly red cardstock and a silver glitter sheet with holographic sparkles in it, slightly offsetting the layers  when glued on top of my Drop Ornament backdrop die in smooth solid red cardstock. I also cut out the ornament top in the same silver glitter paper and glued and added a silver ribbon as to hang my ornament on.

The pine sprigs are cut out of green cardstock. I also decided to cut out one from the silver glitter paper and snipped it into two pieces to pull in more Christmas bling to my card. 


I framed the sides of the black panel with a thin strip from the same sparkly red cardstock. The white starry panels are embossed using Simon Says Stamp Rainbow Splash Embossing Folder Twinkling Stars, misting my paper slightly before running it through my Big Shot. I stamped and embossed my sentiment in silver embossing powder. Not perfectly stamped- again. Using textured cardstock sure doesn`t help. Maybe I really should push my wish for a stamping platform up on my Christmas list 😅


On the inside I stamped and embossed in silver a sweet Christmas text in norwegian from Kort og Godt   (M-232). Google translates it into someting like: 
"Thou star over Bethlehem
send thy rays down
and remind us that the commandments 
of Christmas 
are love and peace"
The text is actually the 3. verse of a Christmas hymn from Sweden. In Norway a more loosely translated version of the song is most popular. 
This is one of mye favorite songs around Christmas. Here is a link if you want to listen


Some red glitter sprinkles from Doodlebug and a red envelope, and my first Christmas card for this season is done.


I`m entering this card to:

Crafty Catz: Crafty Catz #658 -Make it Sparkle     (craftycatzweeklychallenge.blogspot.com)     2.nd entry

Wohoo! So happy to be among top 3!  Crafty Catz: Crafty Catz #659 Anything Goes (craftycatzweeklychallenge.blogspot.com)

Stamping Sensations: November challenge

Peace On Earth Christmas : Peace On Earth Challenge #51

Facebook Korthobbys inspirasjonsgruppe November utfordring- advent eller jul 


Thank you so much for stopping by, I hope you got inspired to create yourself a happy day crafting too. 

Hugs,

-Christine 💮

Monday, November 13, 2023

Another Dream Catcher Card

 Hi,

I`m back with another dream catcher card. This time I made an A2 size card in blue and white, and I`m so happy with how this card turned out. 

I am still trying to use up some of the papers I`ve been hoarding and I think this starry night paper was perfect for this card. To darken the edges and draw the eye to the center of the card, I used Distress ink in Faded Jeans and then Black soot being careful not to go in as far as I did with the dark blue ink. 


The dream catcher die and the feathers from Marianne design is cut out of smooth white cardstock, the same as my card base. I added some white feathers together with the die cuts and I love how it looks. The sentiment is embossed with silver embossing powder to pick up the little silver touch from the silver pearl treaded into my bow. I also added some white flat back pearls at the end of the sentiment banner and in a couple of stars on the background. The beautiful blue sprinkles with glitter are from Doodlebug.


And here is another look at the card. 


I like to enter this to:

Simon Says: Thinking Of You | (simonsaysstampblog.com) 2.nd entry

The Male Room: Challenge 180 - Feathers (themaleroomchallengeblog.blogspot.com) 2.nd entry

WOHOO I WAS THE LUCKY WINNER The Male Room: Winners #180 - Feathers (themaleroomchallengeblog.blogspot.com)


Crafty Catz: Crafty Catz #658 -Make it Sparkle (craftycatzweeklychallenge.blogspot.com)


I hope this dream catcher card inspired you to get crafty and create yourself a happy day crafting too. I sure had fun today.


Hugs,

Christine💮


Friday, November 10, 2023

Dream Catcher card

 Hi,

Today I`m back with a quick post to share my latest card with you. I made a dream catcher card using an older die from Marianne design. I colored a panel using Dylusions orange and yellow paint applying it with a baby whipe. Then I cut out my feathers trying to get a two tone effect on them to add some more interest.


The text is actually a stamp from Visible image that I love to use. This time the stamping was too light and since I don`t have a stamping platform I decided to just write over with a pen. I really, really want to invest in a stampingplatform, however, when I`m ordering there is always so much fun stuff I really, really want so I`ll have to wait for that one and just embrace the imperfections in the meantime. I darkened my edges with Distress ink in black soot, and I also went around my dream catcher with this to make it stand out more from the background. 


I added some string and pearls to my dream catcher and also used some old Prima bling from my stash.


I like to enter this to:

The Male Room: Challenge 180 - Feathers (themaleroomchallengeblog.blogspot.com)


Simon Says: Thinking Of You | (simonsaysstampblog.com)


I really like how this turned out in the end, and I hope you got inspired to create yourself a happy day crafting too.


Hugs,

-Christine💮

Wednesday, November 1, 2023

Make a beautiful card gift set and a matching birthday shaker card

 Hi,

Today I can finally show you this beautiful card set you can easily recreate with your pattern paper and make your own card gift set. I`m planning to make some Christmas card gift set as well. Perfect as a pre Christmas gift or as a host gift so they have cards to send out this season. But lets get back to this all year around card gift set. 

Since I made this to go along with a birthday gift I made a matching shaker birthday card.

I`ve had this sweet paper pack in my stash forever and this was the perfect opportunity to cut into them. I love the colors and the design, perfect for these types of cards.  I used a circle die and popped up the panel on foam tape. I glued down some purple pearls since I know the recipiant likes this color, and I also glued down a few of the sparkly shaker elements so there still is some interest when you hold the card upright. I added some sparkly twine around the card panel before gluing it down to my A2 card base. 


Here are the cards I made as a gift set using the same pattern paper pack. For this one I used a boarder die from La la land craft and added the # with congratulation on Norwegian. If you don`t have boarder die, you can use a border punch and get the same lovely layered effect.


On this card I went for a similar design but covering more of the card with pattern paper and I added the same sparkly twine and some bling instead of a sentiment making it very versatile and neutral..


Here I used a striped pattern paper from the same paper pack adding a birthday sentiment and popping the panel on foam tape for dimension. I added some bling across from corner to corner and I think this is another versatlie card suitable for masculine and female birthdays.


I loved that this paper pack also had some papers with craft color. This is another simple jet pretty design cutting the paper pattern at a diagonal angle. To pull in the black and also finish of the pattern paper i added a thin black stripe before I used another #birthday sentiment. I felt something was missing, so I decided to add another thin strip of the same pattern paper and I really love how this card turned out.


Another simple design letting the paper be the main focus on the card, just stamping the bold sentiment that translates into " Hello, my dear friend". I used glossy accent on the bird to make it pop, but its hard to catch on the photo.


To keep my card set together I simply cut out a strip of the pattern paper and glued on a circle for decoration and to keep the band closed. I used clear cellophane envelopes that are very nice to use if you hand out the card in person. The recipient can always just put the card in an envelope for shipping.  


I am really enjoying creating these A2 card size cards, but getting the perfect A2 size envelopes here in Norway has proven to be a challenge. If you know where I can get some in Norway please leave me a comment. 💖


I`m entering this to:

So excited to be among the Top 3 with my shaker card. Wohoo!

Thank you so much for stopping by, I hope you got some ideas and got inspired to create yourself a happy day crafting too.

Hugs,
-Christine💮